GamesFPSCall of DutyCall of Duty: Black Ops 6How to complete the Zombies easter eggs in Black Ops 6When you purchase through links on our site, we may earn an affiliate commission.Here’s how it works.
GamesFPSCall of DutyCall of Duty: Black Ops 6How to complete the Zombies easter eggs in Black Ops 6When you purchase through links on our site, we may earn an affiliate commission.Here’s how it works.
When you purchase through links on our site, we may earn an affiliate commission.Here’s how it works.
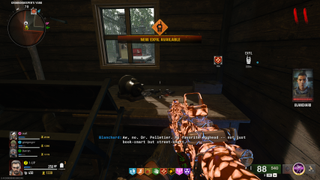
(Image credit: Activision)

Jump to:Liberty FallsTerminus
Jump to:Liberty FallsTerminus
It wouldn’t be a Call of Duty: Black Ops game without Zombies, now, would it? And it wouldn’t be Zombies without an incredibly well-hidden and complex easter egg that reveals the true story of each map. Though they were solved remarkably quickly, theBlack Ops 6Zombies easter eggsare among the most long-winded and challenging.
Zombies is far different from multiplayer, though you’ll be pleased to hear that your weapon progression and other unlocks carry over into Zombies. This means you can start both Liberty Falls and Terminus armed to the teeth. It will certainly help in the early stages of the easter egg but it will still be far from easy. To save you the trouble of figuring them out for yourself, here’s how to beat the Liberty Falls and Terminus main easter eggs.
Black Ops 6 Liberty Falls easter egg guide
(Image credit: Activision)

You will need to take out zombies and progress through the map as usual until you unlock the church/Dark Aether, which contains the Pack-a-Punch machine. Once there, interact with the strange machine to the right of the main door known as the SDG Generator. There’s no prompt but when you interact with it, a character called Panos will begin to speak, letting you know you’re ready to begin the easter egg.
It’s a good idea to leave one zombie alive in a round when you’re attempting to complete the following easter egg steps. This will give you some breathing room to investigate and interact with things without fear of dying and risking your progress. Likewise, Decoys are also incredibly handy.
Here is an overview of the main Liberty Fall quest steps:
Assemble the Jet Gun
Before you can properly start the Liberty Falls easter egg, however, you need to get your hands on the map’s unique Wonder Weapon—theJet Gun. While youcanget it from the mystery box, there are no guarantees. So, your best bet is to craft it with three hidden parts:
Water pressure gauge
The first part you will need is the water pressure gauge, though you will first need to grab awater valve. This is located at the front of Lily’s Flowerpot shop on Hill Street. Here, you will find a tap against the wall to the right of the broken door, near a flower display. Hold the interact button to pick up the water valve.
Image1of2Water valve.(Image credit: Activision)Water pressure.(Image credit: Activision)
Image1of2Water valve.(Image credit: Activision)Water pressure.(Image credit: Activision)
Image1of2
Water valve.(Image credit: Activision)Water pressure.(Image credit: Activision)
Water valve.(Image credit: Activision)Water pressure.(Image credit: Activision)
Water valve.(Image credit: Activision)
Water valve.(Image credit: Activision)
Water valve.(Image credit: Activision)
Water valve.(Image credit: Activision)
Water valve.(Image credit: Activision)

Water pressure.(Image credit: Activision)
Water pressure.(Image credit: Activision)
Water pressure.(Image credit: Activision)
Water pressure.(Image credit: Activision)
Water pressure.(Image credit: Activision)
With the water valve in hand, head over to the bowling alley and break the wall panel to the right of the lanes (either with your weapon or melee) to expose the water pressure system. Interact with it to attach the valve and then hold the interact button to increase the water pressure.
Once the pressure is full, the zombies will burn and the water pressure gauge will fall onto the floor for you to collect.
Handbrake
To get the handbrake, you need to kill a special Groundskeeper zombie in the graveyard to the right of the church. Head into this area and slay out until this unique enemy spawns. Unfortunately, it is random so you’ll have to stick with it until you get lucky.
(Image credit: Activision)
Once you’ve defeated the Groundskeeper, pick up thetoolshed keyand make your way out of the graveyard and to the left, down a driveway next to the white house. At the end of the drive is the Groundskeeper’s shed, which you can now open. The handbrake is located on the desk to the right of the shed.
Electrical wires
The final part you need to craft the Jet Gun is electrical wires. To do this, break the gates blocking the Radio House shop on Riverside (near the starting location, across the road from the comic book shop). However, you will need aMangler cannonto break it open.
(Image credit: Activision)

This can be done in one of three ways:
Once opened, go inside and interact with the four pools of blood until one eventually gives you the electrical wires.
With all three parts in hand, go to the motel in the starting area and head up the stairs. A group of zombies will charge out of a room, revealing a crafting bench where you can assemble the Jet Gun.
Assemble the LTG Device
Image1of3Olly’s Comics.(Image credit: Activision)Washington Avenue.(Image credit: Activision)Church.(Image credit: Activision)
Image1of3Olly’s Comics.(Image credit: Activision)Washington Avenue.(Image credit: Activision)Church.(Image credit: Activision)
Image1of3
Olly’s Comics.(Image credit: Activision)Washington Avenue.(Image credit: Activision)Church.(Image credit: Activision)
Olly’s Comics.(Image credit: Activision)Washington Avenue.(Image credit: Activision)Church.(Image credit: Activision)
Olly’s Comics.(Image credit: Activision)
Olly’s Comics.(Image credit: Activision)
Olly’s Comics.(Image credit: Activision)
Olly’s Comics.(Image credit: Activision)
Olly’s Comics.(Image credit: Activision)
Washington Avenue.(Image credit: Activision)
Washington Avenue.(Image credit: Activision)
Washington Avenue.(Image credit: Activision)
Washington Avenue.(Image credit: Activision)
Washington Avenue.(Image credit: Activision)
Church.(Image credit: Activision)
Church.(Image credit: Activision)
Church.(Image credit: Activision)
Church.(Image credit: Activision)
Church.(Image credit: Activision)
Whether you crafted it or were lucky enough to get it in the mystery box, now that you’ve got the Jet Gun, you can start the main easter egg quest. This begins with you assembling the LTG device from three parts. Here’s where you can find them:
Olly’s Comics
Washington Avenue
Church
Head into the church through the main entrance and almost immediately turn around and look up. Near Panos, you can find the third and final LTG part on the balcony which you can once again collect using the Jet Gun.
With all three parts collected, use the zipline from the graveyard to reach the Washington Avenue Rooftops (near the exfil area). Here, in the northeast corner, you will find a workbench that you can use to craft the LTG Device.
Portal Storms: Cemetery
Now you have the LTG Device, you need to interact with two portals—one in the cemetery and the other near the starting area of Riverside. These can be done in either order, though there is a step that must be completed between each one. Personally, I prefer to start with the cemetery, as it’s as simple as taking the zipline back from the rooftop.
Before you start the storm, go inside the church and interact with the easter egg machine to collect anAether Canister. You will need to carry this to the Dark Aether trap on Washington Avenue (near Speed Cola) and place it within its radius. Be careful though, as you will be unable to run while carrying the canister. With this in mind, it’s best to keep one zombie alive to delay the next round.
Image1of2Cemetery storm portal(Image credit: Activision)Cemetery storm boss(Image credit: Activision)
Image1of2Cemetery storm portal(Image credit: Activision)Cemetery storm boss(Image credit: Activision)
Image1of2
Cemetery storm portal(Image credit: Activision)Cemetery storm boss(Image credit: Activision)
Cemetery storm portal(Image credit: Activision)Cemetery storm boss(Image credit: Activision)
Cemetery storm portal(Image credit: Activision)
Cemetery storm portal(Image credit: Activision)
Cemetery storm portal(Image credit: Activision)
Cemetery storm portal(Image credit: Activision)
Cemetery storm portal(Image credit: Activision)
Cemetery storm boss(Image credit: Activision)
Cemetery storm boss(Image credit: Activision)
Cemetery storm boss(Image credit: Activision)
Cemetery storm boss(Image credit: Activision)
Cemetery storm boss(Image credit: Activision)
Cemetery Storm
Make your way over to the storm cloud in the cemetery and interact with the plate on the ground. This will place the LTG and begin a timed encounter where you mustdefend the portal from waves of zombies for one minute. Any zombie that makes contact with the portal will damage it. Should you fail, you will have to wait a round before you can restart.
Once you have defended the portal for one minute, a named boss will spawn—either a Mangler or an Abomination.Weaken this boss but be careful not to kill it. When it is low on health, it will begin to emit a purple glow, at which point you must bait it into the Dark Aether trap we set up earlier. Activate the trap when the boss is within its radius and its soul will be absorbed.
You then need to take this charged canister back to the machine inside the church. However,picking up the canister will begin a one-and-a-half minute countdownso you’re against the clock.
Strauss Counter location
With the canister secured inside the machine, a new compartment will open on the left, rewarding you with the Strauss Counter. This device will replace yourTactical slot. To use the Strauss Counter, hold your Tactical button to raise the device.
The correct sequence of lights will be random each time, so unfortunately you will have to put in the legwork.
Image1of3Hilltop Stairs projector(Image credit: Activision)Yummy Freeze Rooftop projector(Image credit: Activision)Groundskeeper’s Yard projector(Image credit: Activision)
Image1of3Hilltop Stairs projector(Image credit: Activision)Yummy Freeze Rooftop projector(Image credit: Activision)Groundskeeper’s Yard projector(Image credit: Activision)
Image1of3
Hilltop Stairs projector(Image credit: Activision)Yummy Freeze Rooftop projector(Image credit: Activision)Groundskeeper’s Yard projector(Image credit: Activision)
Hilltop Stairs projector(Image credit: Activision)Yummy Freeze Rooftop projector(Image credit: Activision)Groundskeeper’s Yard projector(Image credit: Activision)
Hilltop Stairs projector(Image credit: Activision)
Hilltop Stairs projector(Image credit: Activision)
Hilltop Stairs projector(Image credit: Activision)
Hilltop Stairs projector(Image credit: Activision)
Hilltop Stairs projector(Image credit: Activision)
Yummy Freeze Rooftop projector(Image credit: Activision)
Yummy Freeze Rooftop projector(Image credit: Activision)
Yummy Freeze Rooftop projector(Image credit: Activision)
Yummy Freeze Rooftop projector(Image credit: Activision)
Yummy Freeze Rooftop projector(Image credit: Activision)
Groundskeeper’s Yard projector(Image credit: Activision)
Groundskeeper’s Yard projector(Image credit: Activision)
Groundskeeper’s Yard projector(Image credit: Activision)
Groundskeeper’s Yard projector(Image credit: Activision)
Groundskeeper’s Yard projector(Image credit: Activision)
TheHilltop Stairs projectoris the most obvious of the bunch, simply placed on the grass next to—you guessed it—the Hilltop Stairs. It overlooks the bus outside Liberty Lanes bowling alley.
To reach theYummy Freeze Rooftop projectorfrom the Hilltop Stairs, it’s a quick sprint to the Alamo rooftop, accessed via the zipline lift. On the roof, remove the debris marked with a red cross in the low wall to the east and drop down to the lower roof. The projector is found next to the sandbags on the right.
The final projector can be found in theGroundskeeper’s Yard, near the shed where the Jet Gun’s handbrake was hidden inside. The projector is in the patch of grass near the large fences to the east.
Portal Storms: Riverside
(Image credit: Activision)

Return to the first storm that you completed (which will be in the cemetery, if you’ve been following this guide verbatim) and collect the LTG Device. Then, you’ll need to head over to the other storm and repeat the process. In this case, that’s onRiverside. Ensure you’ve got all the equipment and ammo that you need as you’ll once again be in for a fight.
Lure the boss to the trap.(Image credit: Activision)

Successfully clear out the waves and defend the portal, and another boss will spawn.Lure this boss into the Dark Aether trapand activate it to absorb its energy in the canister you placed just before.
Like last time, you will then have to carry this canister all the way back to the church to place it in the device, though it’s a lot further to run in just one minute and 30 seconds. Whether you’re playing in co-op or not,it’s a good idea to have some Decoy grenades,or only keep one zombie aliveso you don’t have to worry about staying alive.
Survive the Final Encounter
With the second Aether Canister placed in the SDG Generator, you’re officially ready to start the Final Encounter. How ominous!
You will be trapped inside the Dark Aether (in other words the church) as you fight off three waves of zombies and elites. With such limited space and some challenging enemies sent your way, it’s naturally a hard encounter.
Before you start, ensure you are geared up with level three armour, Jugger-Nog, and at least a level two Pack-a-Punched weapon. Additional items like Decoys, Monkey Bombs, and Killstreaks will also be useful.
Obviously, a max Pack-a-Punch weapon will do the most damage, though be careful not to be too reliant on this if you’re low on funds. While there is an ammo box inside, remember it will cost you $10,000 to buy ammo for such a top-tier weapon. That’s why it’s a good idea to also bring a level two Pack-a-Punched weapon as a backup since ammo is cheaper.
Start the Final Encounter whenever you feel ready and, should you survive, you will be automatically downed and enter a cutscene with Panos who will reveal their master plan.
Once this cutscene is over, you will have the option to either continue playing or exit the match. If you choose to continue, you’ll be rewarded heavily with additional currency, high-quality weapons, an Aether Tool to upgrade weapon rarity for free, and a Raw Aetherium Crystal to use the Pack-a-Punch machine for free, too.
Black Ops 6 Terminus easter egg guide
(Image credit: Activision)
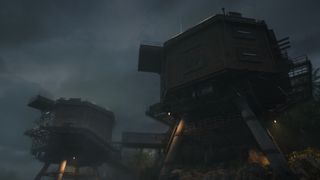
Ready to take on the true challenge of Terminus, eh? Being a much more claustrophobic map, Terminus is certainly the harder of the two launch Zombies maps, not to mention the more troublesome main easter egg too.
Before you can begin the Terminus main easter egg though, you must first turn on the power as usual. Follow the markers to activate the three AMP Generators, leading you all the way to the Bio Lab.
Here is an overview of the main Terminus quest steps:
Assemble the Terminus Wonder Weapon
Like Liberty Falls, you will need to get your hands on the Terminus Wonder Weapon before you can start the main easter egg. While it is possible to get it from the box, you’re best off crafting it since you won’t need luck—just skill and the Dead Wire ammo mod from The Arsenal machines. To craft it, you will need to collect three Beamsmasher parts and unlock the crafting room. Here’s how:
Opening the Research Office
(Image credit: Activision)
With these three boxes activated, head to Living Quarters (the small room with Jugger-Nog) where you will find another electrical box next to the AMP Generator. If you’ve completed the previous step correctly, it should be arcing with electricity. Shoot this box and then head outside into the courtyard to the west where the final electrical box can be seen on the wall of Living Quarters. Shoot this to open the green doors directly ahead of you, revealing the Research Office.
(Image credit: Activision)
Inside the Research Office, you can find thecrafting benchused to eventually assemble the Beamsmasher, as well as a computer which we’ll get to later. Most important right now, however, is that you kill the trapped zombie to your left, which will drop anEMF Fobfor you to collect.
Activate the Laptops to get the first Multiphasic Resonator.
With the Research Office open, it’s time to start assembling the components for the Beamsmasher. The first step in doing so is to activate three laptops hidden around the main island, each with a different symbol and allocated letter on them, though there’s no need to remember these right now.
Image1of3Communications laptop(Image credit: Activision)Storage Area laptop(Image credit: Activision)Docks laptop(Image credit: Activision)
Image1of3Communications laptop(Image credit: Activision)Storage Area laptop(Image credit: Activision)Docks laptop(Image credit: Activision)
Image1of3
Communications laptop(Image credit: Activision)Storage Area laptop(Image credit: Activision)Docks laptop(Image credit: Activision)
Communications laptop(Image credit: Activision)Storage Area laptop(Image credit: Activision)Docks laptop(Image credit: Activision)
Communications laptop(Image credit: Activision)
Communications laptop(Image credit: Activision)
Communications laptop(Image credit: Activision)
Communications laptop(Image credit: Activision)
Communications laptop(Image credit: Activision)
Storage Area laptop(Image credit: Activision)
Storage Area laptop(Image credit: Activision)
Storage Area laptop(Image credit: Activision)
Storage Area laptop(Image credit: Activision)
Storage Area laptop(Image credit: Activision)
Docks laptop(Image credit: Activision)
Docks laptop(Image credit: Activision)
Docks laptop(Image credit: Activision)
Docks laptop(Image credit: Activision)
Docks laptop(Image credit: Activision)
Now, head intoSea Towerwhere you will find a briefcase with a severed hand clutching it on a desk opposite Elemental Pop. Interact with the briefcase to open it using the EMF Fob and grab theMultiphasic Resonator.
(Image credit: Activision)

Get the Computer Code.
Return to the Research Office and interact with the computer directly ahead of the entrance. This will place the Multiphasic Resonator on the top, at which point you can interact with it again to display acode interface.
Image1of2Computer code interface(Image credit: Activision)Bribe Peck for the correct answer(Image credit: Activision)
Image1of2Computer code interface(Image credit: Activision)Bribe Peck for the correct answer(Image credit: Activision)
Image1of2
Computer code interface(Image credit: Activision)Bribe Peck for the correct answer(Image credit: Activision)
Computer code interface(Image credit: Activision)Bribe Peck for the correct answer(Image credit: Activision)
Computer code interface(Image credit: Activision)
Computer code interface(Image credit: Activision)
Computer code interface(Image credit: Activision)
Computer code interface(Image credit: Activision)
Computer code interface(Image credit: Activision)
Bribe Peck for the correct answer(Image credit: Activision)
Bribe Peck for the correct answer(Image credit: Activision)
Bribe Peck for the correct answer(Image credit: Activision)
Bribe Peck for the correct answer(Image credit: Activision)
Bribe Peck for the correct answer(Image credit: Activision)
Whichever way you acquired the correct code, enter it into the computer in Research Office and the display will start highlighting various islands around the map. Complete one round and the computer will then pinpoint one island in particular that you will need to head to. This could be eitherCastle Rock Island,Crab Island, orTemple Island.
Head down to either the Docks under Sea Tower or the Bio Lab, spawn a tactical raft and travel to the island that was displayed on the computer. For me, it was the island to the east known as Castle Rock Island. This begins the process of acquiring the Beamsmasher parts.
Locate the other Beamsmasher parts
Sail to the correct island and you will see a large blue orb pulsing with energy. Interact with the orb to begin a challenge that will spawn waves of zombies. Occasionally, a zombie will glow blue. Defeat this marked enemy and it will drop an orb, which you must pick up and run into the large blue orb. Repeat this process two more times and this orb will disappear, dropping anotherMultiphasic Resonator.
(Image credit: Activision)

You will need to repeat this process on the other two islands. However,it can only be completed in a specific order: blue, green, purple. If the island you head to doesn’t have an orb yet, then you’ve skipped an island.
After you’ve cleared the orbs on each island, finishing with the purple orb, it will drop theAMP Munition. This is the second part of the Beamsmasher.
The third and final part of the Beamsmasher is, thankfully, much easier to get. Simply make your way to Engineering back on the main island (east of Living Quarters) and look for theBatteryon the desk in the middle of the room.
Return to the Research Office and interact with the Workbench to craft the Beamsmasher Wonder Weapon. Now, you’re ready to start the main easter egg quest for real.
Beamsmashing Tentacles: Get the Hard Drive
(Image credit: Activision)

The first true step of the Terminus easter egg is to acquire aHard Drive. To do this, head into the Bio Lab and find theTentacle Trapwhich has a broken vent above it. There are two Tentacle Traps in Bio Lab and the correct one will be random each game. If you can’t find the correct trap, then it’s possible that it could also be the Tentacle Trap in Living Quarters, though this is less likely.
Activate the trap and continuously fire the Beamsmasher at the tentacles until they drop the Hard Drive item on the ground. If you can’t activate the trap, then it’s because you haven’t yet opened the door it’s covering.
Once you have the Hard Drive, return to Peck in the Guard Station and deposit it in the box at the bottom of the window. Afterwards, Peck will send you off to find Nathan in the Bio Lab.
How to get Nathan’s Code
(Image credit: Activision)
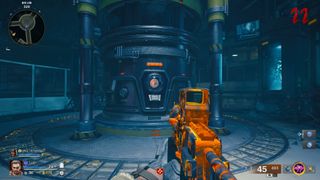
Image1of3First digit location(Image credit: Activision)Second digit location(Image credit: Activision)Third digit location(Image credit: Activision)
Image1of3First digit location(Image credit: Activision)Second digit location(Image credit: Activision)Third digit location(Image credit: Activision)
Image1of3
First digit location(Image credit: Activision)Second digit location(Image credit: Activision)Third digit location(Image credit: Activision)
First digit location(Image credit: Activision)Second digit location(Image credit: Activision)Third digit location(Image credit: Activision)
First digit location(Image credit: Activision)
First digit location(Image credit: Activision)
First digit location(Image credit: Activision)
First digit location(Image credit: Activision)
First digit location(Image credit: Activision)
Second digit location(Image credit: Activision)
Second digit location(Image credit: Activision)
Second digit location(Image credit: Activision)
Second digit location(Image credit: Activision)
Second digit location(Image credit: Activision)
Third digit location(Image credit: Activision)
Third digit location(Image credit: Activision)
Third digit location(Image credit: Activision)
Third digit location(Image credit: Activision)
Third digit location(Image credit: Activision)
First digit
The first digit of the code to unlock Nathan’s chamber isveryeasy to miss. Go to the Interrogation Rooms (near the Guard Station featuring Peck) andlook at the clock on the wall behind the fenced-off area. Look specifically at the hour hand, which will tell you the first digit. If the hour hand is between two numbers, then look at the minute hand to round it to the nearest hour.
Second digit
The second digit is just as obscure. Make your way over to the Mess Hall near the Research Office and look for the corkboard next to the window. On this board will be a smallplaying card, which will give you the second number for the code.
Third digit
The third and final digit is located in Engineering. To the right of the crafting table you will find apostercounting the days since the last injury. Surprise, surpise, that number is your final digit.
Before you return to Nathan’s chamber to enter the code, make sure you gear up with armour, ammo, Jugger-Nog, and a Pack-a-Punched weapon as this will trigger a tough encounter. It’s also a good idea to call the Inclined Lift down to the Bio Lab so that you can do a full loop of the arena with no dead ends.
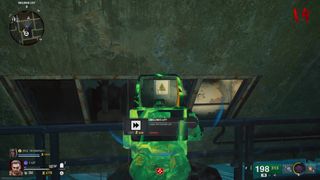
Keycard location(Image credit: Activision)
While the encounter is rather challenging, it’s also pretty straightforward. Whether you’re solo or with a group, it’s best to run around the arena in a loop, firing back at the named Amalgum until it’s dead. Then, you’ll be treated to a cutscene. Afterwards, dive into the water and search for the goldkeycarditem on the ground. This item is very small and spawns in a random location, so it will take some thorough searching to find.
Node Connector locations
(Image credit: Activision)

Once you’ve found the keycard, gear up once again as you’ll have yet another encounter shortly. Take a boat over to thelarge shipwreckto the west and sail underneath the hole in the middle of the wreck. Here, you will find a ladder with a hatch above it. Thanks to the keycard, you’ll be able to enter.
At the top of the ladder is a very small room called the Workshop. Here, there are twoNode Connectorson a desk that, when interacted with, will trigger waves of enemies to spawn while locking you in. If you’re playing with a full party, then you can actually guard one window each. Defeat the enemies and eventually, you will be let out of the room.
Now, you have to take thetwo Node Connectors to two of three randomised locations. You’re looking for a section of thick pipe that is missing a piece. If the pipe is complete, then it’s the wrong location. If you’re playing solo, you will have to do this one at a time, returning to the shipwreck for the second Connector afterwards.
Image1of3Crab Island Node Connector(Image credit: Activision)Docks Node Connector(Image credit: Activision)Sea Caves Node Connector(Image credit: Activision)
Image1of3Crab Island Node Connector(Image credit: Activision)Docks Node Connector(Image credit: Activision)Sea Caves Node Connector(Image credit: Activision)
Image1of3
Crab Island Node Connector(Image credit: Activision)Docks Node Connector(Image credit: Activision)Sea Caves Node Connector(Image credit: Activision)
Crab Island Node Connector(Image credit: Activision)Docks Node Connector(Image credit: Activision)Sea Caves Node Connector(Image credit: Activision)
Crab Island Node Connector(Image credit: Activision)
Crab Island Node Connector(Image credit: Activision)
Crab Island Node Connector(Image credit: Activision)
Crab Island Node Connector(Image credit: Activision)
Crab Island Node Connector(Image credit: Activision)
Docks Node Connector(Image credit: Activision)
Docks Node Connector(Image credit: Activision)
Docks Node Connector(Image credit: Activision)
Docks Node Connector(Image credit: Activision)
Docks Node Connector(Image credit: Activision)
Sea Caves Node Connector(Image credit: Activision)
Sea Caves Node Connector(Image credit: Activision)
Sea Caves Node Connector(Image credit: Activision)
Sea Caves Node Connector(Image credit: Activision)
Sea Caves Node Connector(Image credit: Activision)
With the two Node Connectors slotted, head back to Peck in the Guard Station to pick up theHacking Device.
Where to find and Hack the buoys
Image1of3First Buoy location(Image credit: Activision)Second Buoy location(Image credit: Activision)Third Buoy location(Image credit: Activision)
Image1of3First Buoy location(Image credit: Activision)Second Buoy location(Image credit: Activision)Third Buoy location(Image credit: Activision)
Image1of3
First Buoy location(Image credit: Activision)Second Buoy location(Image credit: Activision)Third Buoy location(Image credit: Activision)
First Buoy location(Image credit: Activision)Second Buoy location(Image credit: Activision)Third Buoy location(Image credit: Activision)
First Buoy location(Image credit: Activision)
First Buoy location(Image credit: Activision)
First Buoy location(Image credit: Activision)
First Buoy location(Image credit: Activision)
First Buoy location(Image credit: Activision)
Second Buoy location(Image credit: Activision)
Second Buoy location(Image credit: Activision)
Second Buoy location(Image credit: Activision)
Second Buoy location(Image credit: Activision)
Second Buoy location(Image credit: Activision)
Third Buoy location(Image credit: Activision)
Third Buoy location(Image credit: Activision)
Third Buoy location(Image credit: Activision)
Third Buoy location(Image credit: Activision)
Third Buoy location(Image credit: Activision)
Firstly, hacking each buoy takes several seconds, during which you will be vulnerable, and against a two-minute timer. If you’re with other players, it’s smart to have a designated driver and hacker, while anyone else takes out any parasites that spawn.
Secondly, after you hack the three buoys, you will immediately progressed to the next step, which is also timed, and requires you to race back to the Bio Lab to defuse three bombs before the game ends. Make sure you’re familiar with the map and which routes you can take.
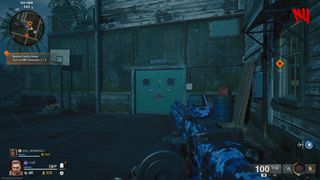
Disarming the Terminus bombs
(Image credit: Activision)

Immediately after hacking the three buoys, you will have to race back to Bio Lab to disarm three bombs around the room within five minutes. Failing to disarm them will result in Terminus exploding and the game ending.
Two bombs are located on the bottom floor at either end of the room, and the final one is on the main floor, directly underneath the raised area that leads to the S.A.M Trial machine.
Survive the Final Encounter
(Image credit: Activision)
Once you have defused all three bombs, your screen will flash white and you will be able to access the Final Encounter, which is located on the lower levels of Bio Lab via a white door with a green light above it.
Before heading there, it’s wise to gear up with tier three armour and Pack-a-Punch, legendary quality weapons, all the perks you want, and a self-revive kit. This final boss is no joke, so any extras like powerups, Gogglegums, and equipment will be very useful.
Like the Liberty Falls Final Encounter, you can buy ammo in this room. However, keep in mind that max Pack-a-Punch ammo is $10,000. So, it’s not a bad idea to keep a tier two Pack-a-Punch weapon as a backup, since it only costs $5,000 to restock.
Entering the Final Encounter will place you into a unique boss room against Patient 13. There will also be infinitely spawning waves of zombies, including elites in the later rounds, and poison-lobbing tentacles. Since the enemies are never-ending, you will want tofocus on the boss as much as you can—though you can also farm money for ammo using the standard zombies.
(Image credit: Activision)
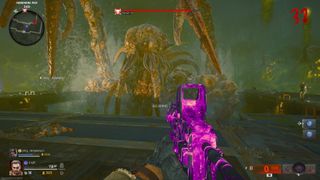
Patient 13 has three phases with unique attacks, so here are some things to keep in mind:
After eventually beating the boss, you will have the option to either continue playing or exit the match. If you choose to continue, you’ll be rewarded additional currency, Perkaholic, high-quality weapons, an Aether Tool to upgrade weapon rarity for free, and a Raw Aetherium Crystal to use the Pack-a-Punch machine for free, too.
Now you know how to beat the Black Ops 6 Zombies easter eggs for Liberty Falls and Terminus, all you need to do is put it to good use. After all, there are exclusive rewards up for grabs for those who are successful.
The biggest gaming news, reviews and hardware deals
More about call of duty
Call of Duty’s $28 Squid Game skins are the perfect crossover for our capitalist dystopia, and Activision knows exactly what it’s doing
Call of Duty’s $28 Squid Game skins are the perfect crossover for our capitalist dystopia, and Activision knows exactly what it’s doing
LatestAll Zenless Zone Zero 1.5 livestream codesSee more latest►
Latest
All Zenless Zone Zero 1.5 livestream codes
All Zenless Zone Zero 1.5 livestream codes
All Zenless Zone Zero 1.5 livestream codes
See more latest►
Most PopularFallout season 2—what we know about the next season set in New VegasHow to unlock Sally in Disney Dreamlight ValleyHow to find a Fast Recon Vehicle in Helldivers 2Best Witch starter build in Path of Exile 2If you’re struggling to look cool instead of cute in Infinity Nikki, don’t miss these hidden clothing merchantsHow to get more spirit in Path of Exile 2Best Sorceress starter build in Path of Exile 2How to obtain Bedrock Crystal in Infinity NikkiHow to get units in Marvel RivalsHow to get the safe code in Indiana Jones and the Great CircleHow to use weapon set skill points in Path of Exile 2
Most PopularFallout season 2—what we know about the next season set in New VegasHow to unlock Sally in Disney Dreamlight ValleyHow to find a Fast Recon Vehicle in Helldivers 2Best Witch starter build in Path of Exile 2If you’re struggling to look cool instead of cute in Infinity Nikki, don’t miss these hidden clothing merchantsHow to get more spirit in Path of Exile 2Best Sorceress starter build in Path of Exile 2How to obtain Bedrock Crystal in Infinity NikkiHow to get units in Marvel RivalsHow to get the safe code in Indiana Jones and the Great CircleHow to use weapon set skill points in Path of Exile 2
Most PopularFallout season 2—what we know about the next season set in New VegasHow to unlock Sally in Disney Dreamlight ValleyHow to find a Fast Recon Vehicle in Helldivers 2Best Witch starter build in Path of Exile 2If you’re struggling to look cool instead of cute in Infinity Nikki, don’t miss these hidden clothing merchantsHow to get more spirit in Path of Exile 2Best Sorceress starter build in Path of Exile 2How to obtain Bedrock Crystal in Infinity NikkiHow to get units in Marvel RivalsHow to get the safe code in Indiana Jones and the Great CircleHow to use weapon set skill points in Path of Exile 2
Most Popular
Fallout season 2—what we know about the next season set in New Vegas
How to unlock Sally in Disney Dreamlight Valley
How to find a Fast Recon Vehicle in Helldivers 2
Best Witch starter build in Path of Exile 2
If you’re struggling to look cool instead of cute in Infinity Nikki, don’t miss these hidden clothing merchants
How to get more spirit in Path of Exile 2
Best Sorceress starter build in Path of Exile 2
How to obtain Bedrock Crystal in Infinity Nikki
How to get units in Marvel Rivals
How to get the safe code in Indiana Jones and the Great Circle
How to use weapon set skill points in Path of Exile 2
HARDWARE BUYING GUIDESLATEST GAME REVIEWS1Best Steam Deck accessories in Australia for 2025: Our favorite docks, powerbanks and gamepads2Best graphics card for laptops: the mobile GPUs I’d want in my next gaming laptop3Best mini PCs in 2025: The compact computers I love the most4Best 14-inch gaming laptop: The top compact gaming laptops I’ve held in these hands5Best Mini-ITX motherboards in 2025: My pick from all the mini mobo marvels I’ve tested1Thank Goodness You’re Here! review: An anarchic treasure trove of jokes and skits2Shiren the Wanderer: The Mystery Dungeon of Serpentcoil Island review—like juggling chainsaws on horseback3WD Black SN850X 8 TB NVMe SSD review4Ikea Utespelare desk review5Asus ROG Harpe Ace Mini wireless mouse review
HARDWARE BUYING GUIDESLATEST GAME REVIEWS1Best Steam Deck accessories in Australia for 2025: Our favorite docks, powerbanks and gamepads2Best graphics card for laptops: the mobile GPUs I’d want in my next gaming laptop3Best mini PCs in 2025: The compact computers I love the most4Best 14-inch gaming laptop: The top compact gaming laptops I’ve held in these hands5Best Mini-ITX motherboards in 2025: My pick from all the mini mobo marvels I’ve tested1Thank Goodness You’re Here! review: An anarchic treasure trove of jokes and skits2Shiren the Wanderer: The Mystery Dungeon of Serpentcoil Island review—like juggling chainsaws on horseback3WD Black SN850X 8 TB NVMe SSD review4Ikea Utespelare desk review5Asus ROG Harpe Ace Mini wireless mouse review
HARDWARE BUYING GUIDESLATEST GAME REVIEWS1Best Steam Deck accessories in Australia for 2025: Our favorite docks, powerbanks and gamepads2Best graphics card for laptops: the mobile GPUs I’d want in my next gaming laptop3Best mini PCs in 2025: The compact computers I love the most4Best 14-inch gaming laptop: The top compact gaming laptops I’ve held in these hands5Best Mini-ITX motherboards in 2025: My pick from all the mini mobo marvels I’ve tested1Thank Goodness You’re Here! review: An anarchic treasure trove of jokes and skits2Shiren the Wanderer: The Mystery Dungeon of Serpentcoil Island review—like juggling chainsaws on horseback3WD Black SN850X 8 TB NVMe SSD review4Ikea Utespelare desk review5Asus ROG Harpe Ace Mini wireless mouse review
HARDWARE BUYING GUIDESLATEST GAME REVIEWS1Best Steam Deck accessories in Australia for 2025: Our favorite docks, powerbanks and gamepads2Best graphics card for laptops: the mobile GPUs I’d want in my next gaming laptop3Best mini PCs in 2025: The compact computers I love the most4Best 14-inch gaming laptop: The top compact gaming laptops I’ve held in these hands5Best Mini-ITX motherboards in 2025: My pick from all the mini mobo marvels I’ve tested1Thank Goodness You’re Here! review: An anarchic treasure trove of jokes and skits2Shiren the Wanderer: The Mystery Dungeon of Serpentcoil Island review—like juggling chainsaws on horseback3WD Black SN850X 8 TB NVMe SSD review4Ikea Utespelare desk review5Asus ROG Harpe Ace Mini wireless mouse review
HARDWARE BUYING GUIDESLATEST GAME REVIEWS
1Best Steam Deck accessories in Australia for 2025: Our favorite docks, powerbanks and gamepads
1Best Steam Deck accessories in Australia for 2025: Our favorite docks, powerbanks and gamepads
1
Best Steam Deck accessories in Australia for 2025: Our favorite docks, powerbanks and gamepads
2Best graphics card for laptops: the mobile GPUs I’d want in my next gaming laptop
2Best graphics card for laptops: the mobile GPUs I’d want in my next gaming laptop
2
Best graphics card for laptops: the mobile GPUs I’d want in my next gaming laptop
3Best mini PCs in 2025: The compact computers I love the most
3Best mini PCs in 2025: The compact computers I love the most
3
Best mini PCs in 2025: The compact computers I love the most
4Best 14-inch gaming laptop: The top compact gaming laptops I’ve held in these hands
4Best 14-inch gaming laptop: The top compact gaming laptops I’ve held in these hands
4
Best 14-inch gaming laptop: The top compact gaming laptops I’ve held in these hands
5Best Mini-ITX motherboards in 2025: My pick from all the mini mobo marvels I’ve tested
5Best Mini-ITX motherboards in 2025: My pick from all the mini mobo marvels I’ve tested
5
Best Mini-ITX motherboards in 2025: My pick from all the mini mobo marvels I’ve tested
1Thank Goodness You’re Here! review: An anarchic treasure trove of jokes and skits
1Thank Goodness You’re Here! review: An anarchic treasure trove of jokes and skits
1
Thank Goodness You’re Here! review: An anarchic treasure trove of jokes and skits
2Shiren the Wanderer: The Mystery Dungeon of Serpentcoil Island review—like juggling chainsaws on horseback
2Shiren the Wanderer: The Mystery Dungeon of Serpentcoil Island review—like juggling chainsaws on horseback
2
Shiren the Wanderer: The Mystery Dungeon of Serpentcoil Island review—like juggling chainsaws on horseback
3WD Black SN850X 8 TB NVMe SSD review
3WD Black SN850X 8 TB NVMe SSD review
3
WD Black SN850X 8 TB NVMe SSD review
4Ikea Utespelare desk review
4Ikea Utespelare desk review
4
Ikea Utespelare desk review
5Asus ROG Harpe Ace Mini wireless mouse review
5Asus ROG Harpe Ace Mini wireless mouse review
5
Asus ROG Harpe Ace Mini wireless mouse review
